
Rendering Leaf Lard
Decades ago when the food industry needed to sell Crisco, lard got a bad name.
But, when science caught up with that false claim, it turns out that lard is way better for you than hydrogenated oils of any kind. Lard contains no trans fats and is lower in saturated fat than butter. It is also made of 60 percent monounsaturated fats which is heart healthy fat that helps lower LDLs (“bad cholesterol”). Lard has a high smoking point making it great for frying without as much danger of becoming carcinogenic.
It’s still fat. So, while we don’t suggest eating it by the spoonful, everyone of a certain age and geographic locale knows that pastries of any kind are kicked up a notch by using lard. Here at CHF, we scoff at pasties encased in anything other than a pastry made using lard.
Oh, sure, we still eat the pasties, but we scoff first.
Using lard you’ve rendered yourself from pigs that have been raised humanely and healthfully is also a must. If animals eat garbage, that ends up stored in their fat. If pigs forage in woodlands, eat barley mast, get plenty of room to roam, their fat can be rendered into a delicate and clean lard second to none. We use AND sell Woodlands Pork leaf lard in our on-farm market. We would be hard-pressed to find a finer source of leaf lard.
Ingredients
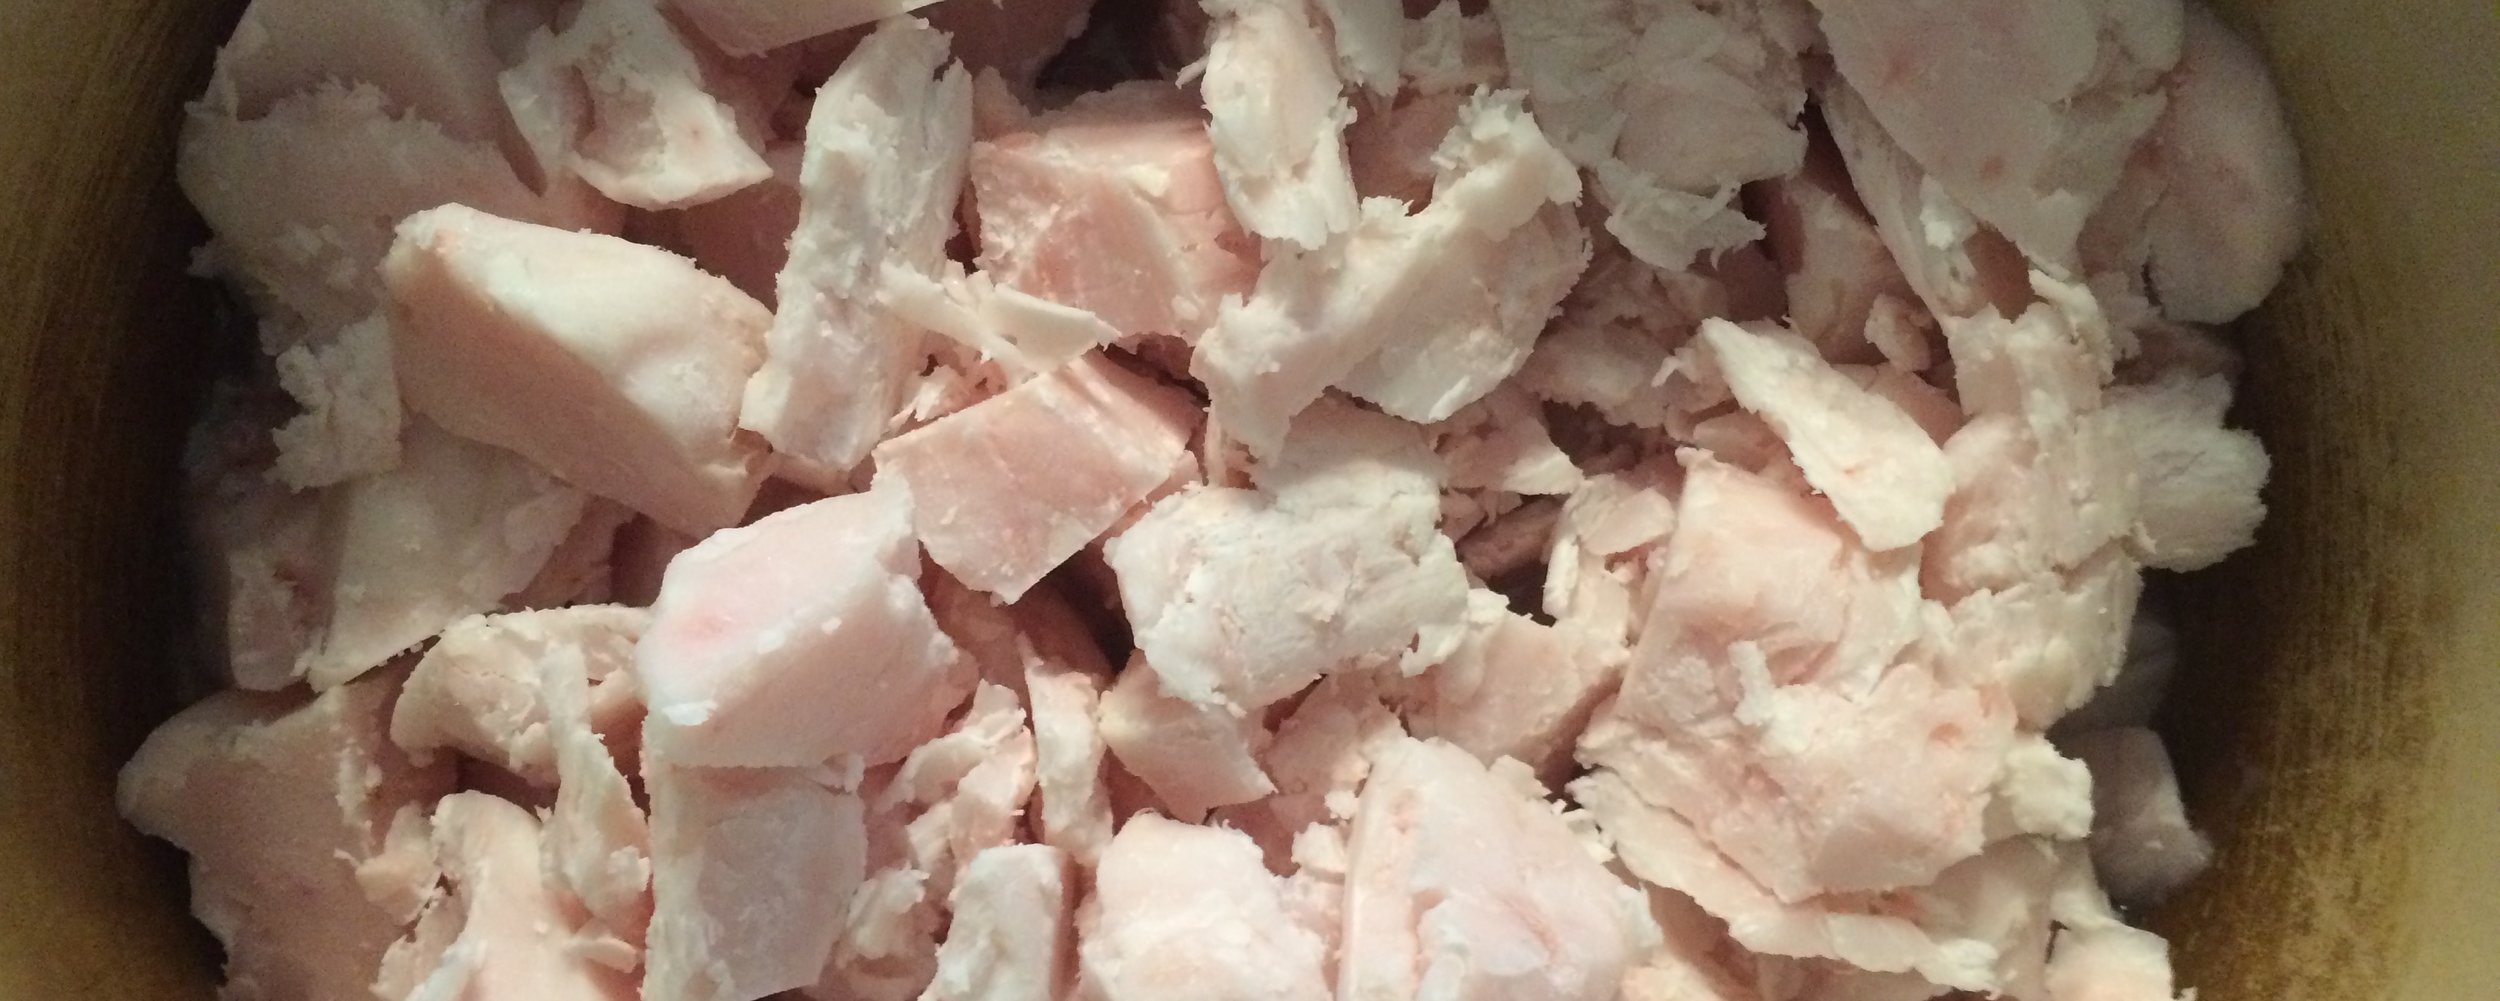
5lb bag of Woodlands Pork leaf lard
Tools
An immersion circulator OR a large crockpot OR a large enameled cast iron dutch oven
A fine sieve OR cheesecloth
6 clean pint jars with lids
Enough refrigerator space to accommodate 5 jars of lard
Directions
Should make at least 4 pints of rendered lard, but have 6 jars on hand. Place all on a cookie sheet and warm them at the lowest setting for your oven a half hour prior to your rendering being done.
Immersion Circulator: Place unopened bag of leaf lard in a 160 degree water bath with an immersion circulator for 2-4 hours (however long it takes to fully melt). Cut open a corner of the bag and carefully pour melted fat through a fine sieve or cheescloth into a large glass or metal bowl. Reserve the remaining soft connective tissue and skip down to bottom to see what to do with those.
Immediately ladle the melted fat into warm pint-sized mason jars and allow to cool enough to transfer to your refrigerator or freezer.
Cast Iron Pot: pour 1/4 cup of water into your enameled cast iron dutch oven, then
Crock Pot: Cut the fat into smallish chunks 1-2 inches across. Turn your crock pot on high, fill with the leaf lard chunks, and allow to melt for 2-3 hours. Check in on it from time to time, but this should not be an attention-heavy process upfront. Once the chunks have considerably shrunk and are resting in a pool of rendered fat, ladle off the melted fat, strain it into a large metal or glass bowl. Lower the temp to low on your crock pot and let the rest of the chunks render until all that’s left are tiny grey-ish bits of the remaining connective tissue. Strain into the bowl of previously strained lard and Reserve the remaining soft connective tissue and skip down to bottom to see what to do with those.
Immediately ladle the melted fat into warm pint-sized mason jars and allow to cool enough to transfer to your refrigerator or freezer.
Cast Iron Pot: Using a cast iron pot takes the least amount of time overall, but is the most time-consuming, because you need to keep a pretty frequent eye on it. Never leave it alone for more than 10-15 minutes.
Cut the fat into small chunks—no more than 1 inch across. Pour 1/4 cup of water into your enameled cast iron dutch oven, then load your leaf lard chunks on top of that. Turn your heat on to low and allow leaf lard to slowly melt.
Once the chunks have considerably shrunk and are resting in a pool of rendered fat, ladle off the melted fat, strain it into a large metal or glass bowl. Let the rest of the chunks render until all that’s left are tiny grey-ish bits of the remaining connective tissue resting in a pool of rendered fat. Strain into the bowl of previously strained lard and reserve the remaining soft connective tissue.
Immediately ladle the melted fat into warm pint-sized mason jars and allow to cool enough to transfer to your refrigerator or freezer.
What to do with the left-over greyish bits after straining?
While not a requirement of rendering lard, you’d be crazy to get rid of the solids you saved after straining the melted fat. You should return those soft grayish bits to a fry pan, sprinkle them with some sea salt and fry them until light brown and crispy. And there you have cracklins. . . which are soooooooo good on salad or sprinkled in cooked greens or cabbage with a little vinegar, freshly ground pepper, and honey. #nomnomnom